A Storyist project can contain text files (manuscript, scripts, notes), story sheets, and images. You can easily create a new project as follows:
The Novel Template—This template provides a starting point for a novel manuscript and includes:
If you want to write a novel and aren’t sure which template to use, select the Novel template.
The Screenplay Template—This template provides a starting point for a film script. It includes:
If you want to write a screenplay and aren’t sure which template to use, choose this one.
The Blank Template—This template provides a starting point for a project of any type. It includes empty folders to hold text files and images. To add text files, story sheets, or additional folders to the project, open the project, and tap the Add (+) button.
To rename a project, simply tap the title text beneath the icon and enter a new title.
Once you’ve created a project, you can rename it by tapping the label beneath the icon in the Storyist home screen and entering a new name.
To open a project, tap its icon in the Storyist home screen.
To delete a project:
Note: The Storyist home screen very similar to the Files app. For more information on how to use its features, see the Apple support article titled “Use the Files app on your iPhone, iPad, and iPod touch.”
After you’ve opened a project, there are several ways to get around. The easiest is to simply tap.
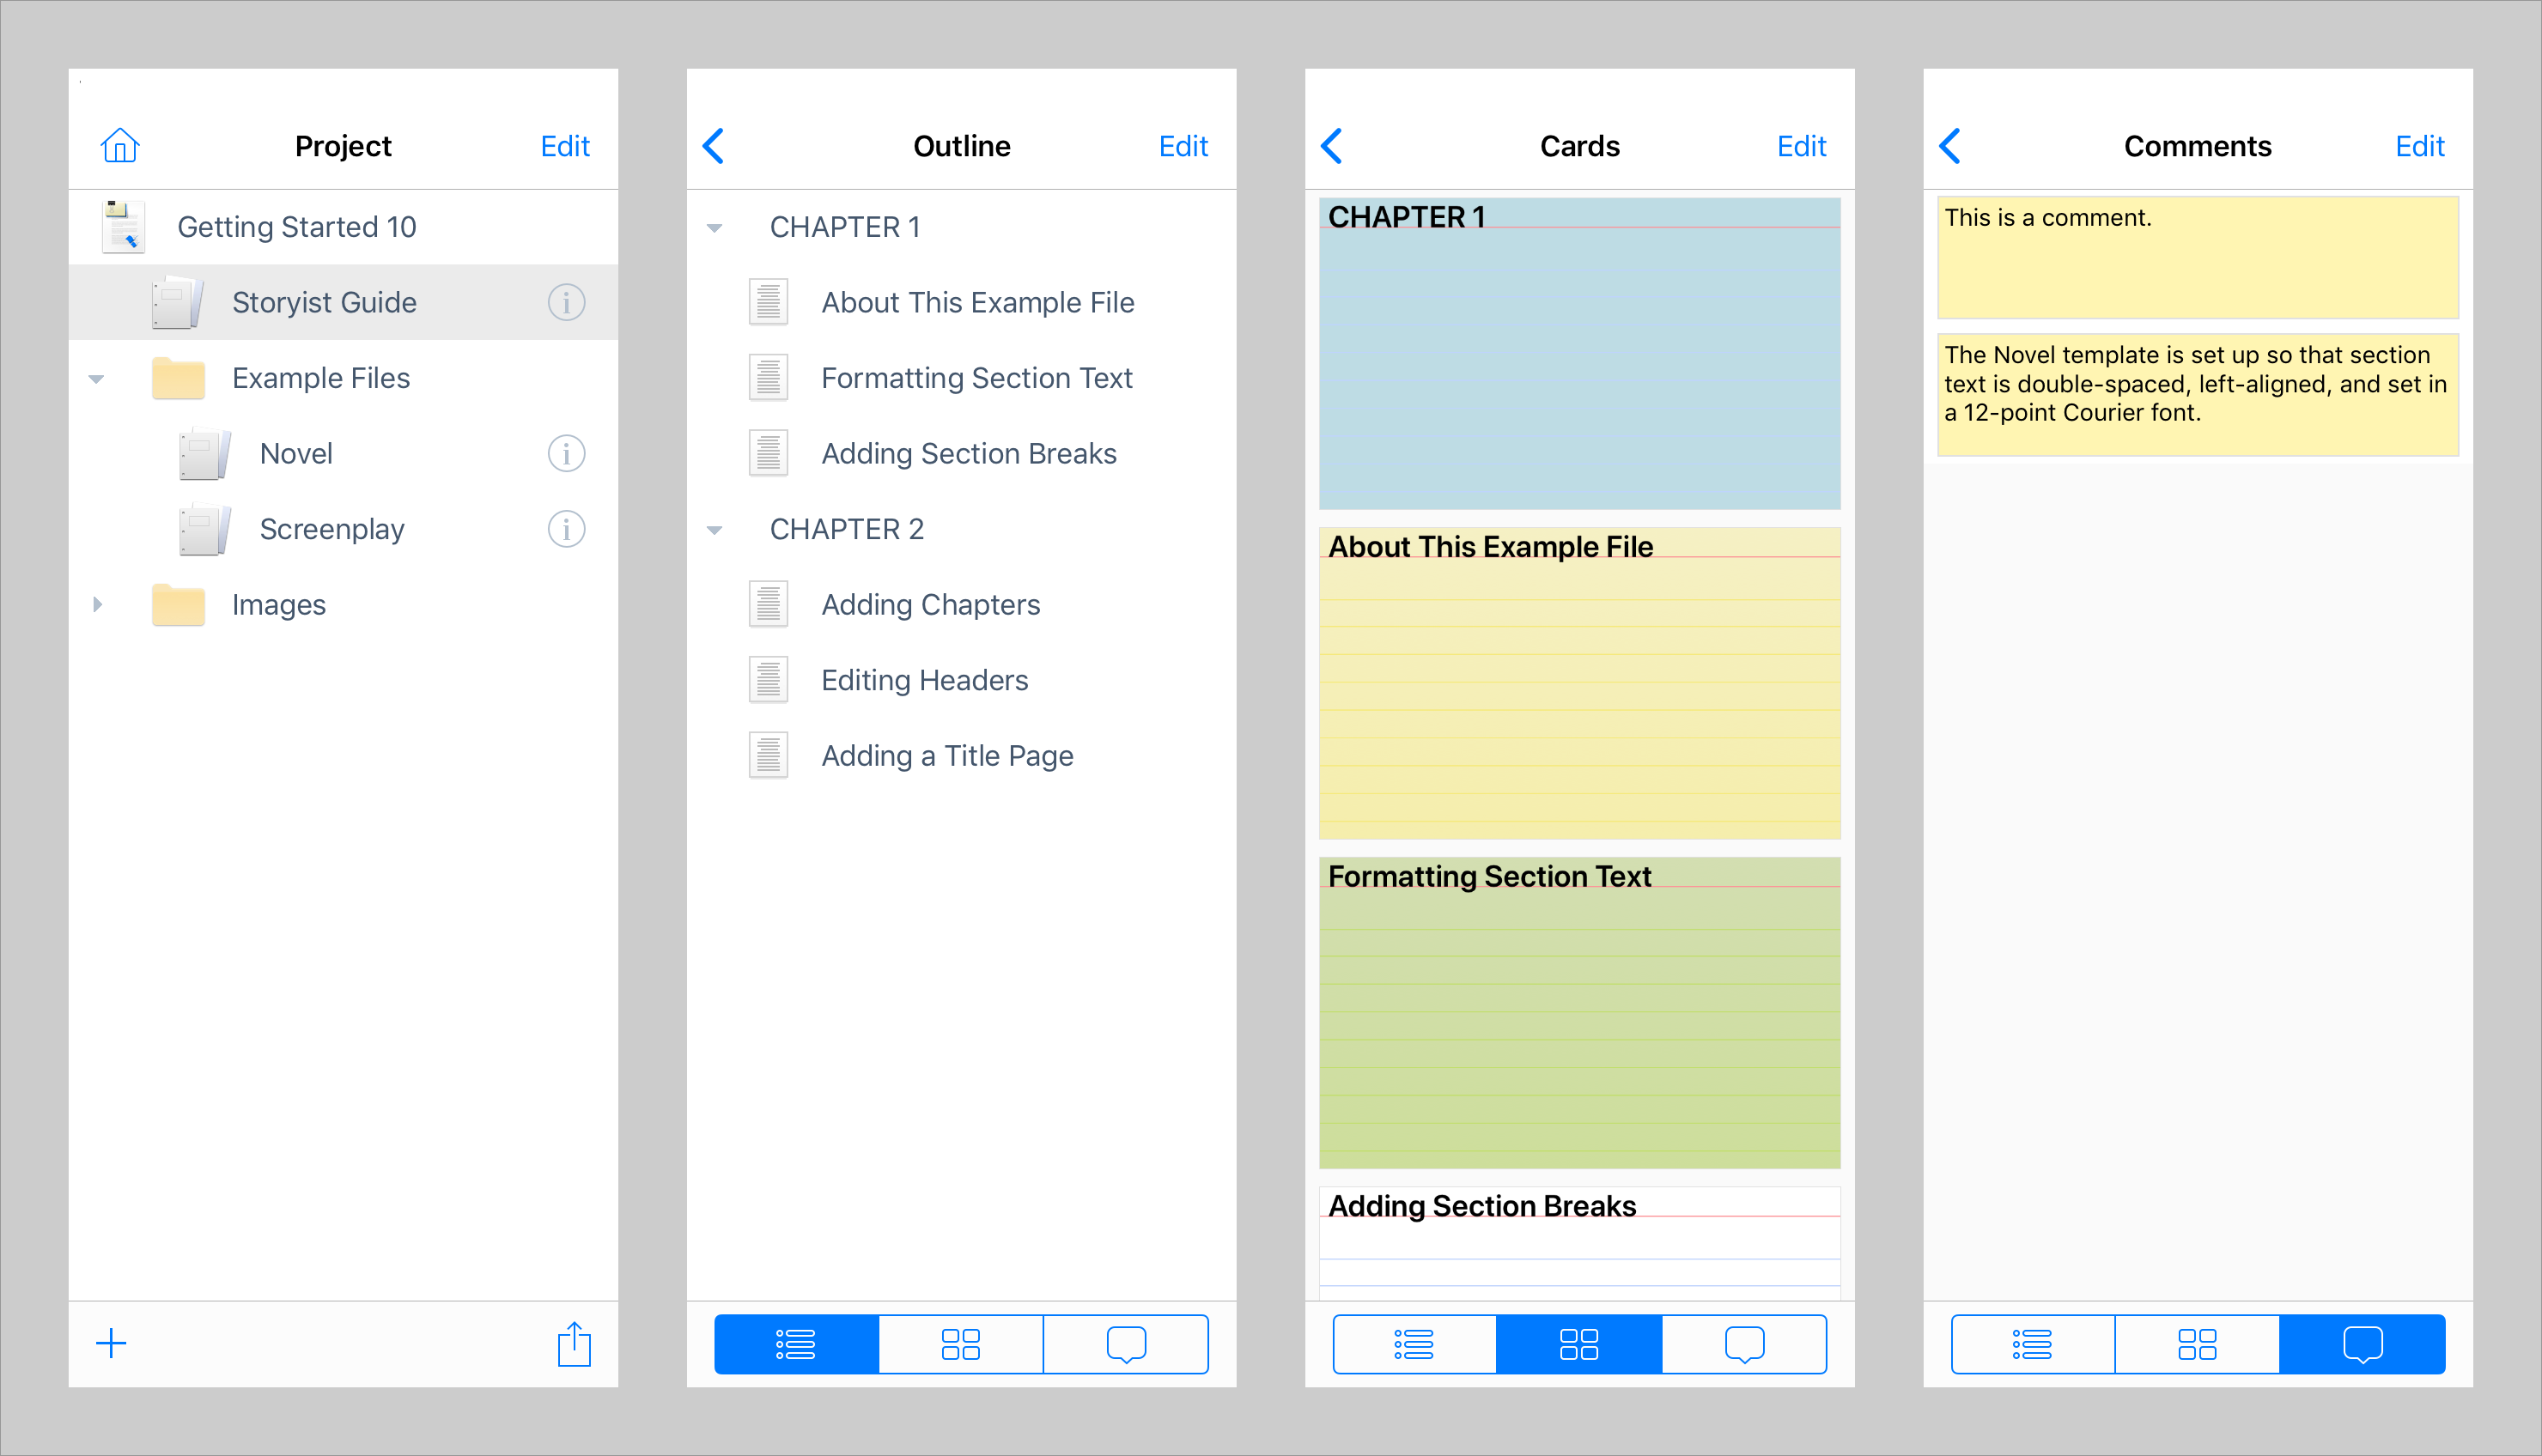
Storyist also includes a navigation sidebar that lets you quickly switch between items in your project. To display it, tap the Navigator button in the toolbar, or swipe from left to right.
If you’re editing a Storyist project, the navigation sidebar initially displays the Project view. This view shows the contents of your project and lets you quickly jump between project files and folders.
In addition to using the Project view to get around, you can also use it to add, rename, delete, and export project items. The Add and Export buttons are available in the bottom bar, and the Rename and Delete buttons are available when you tap the Edit button.
Note: As a shortcut, you can press and hold an item in the navigation sidebar to rename it.
If you’re editing a stand-alone RTF, Plain Text, Fountain, or FDX file, or if you tap the disclosure button next to a text item in the Project view, the navigation sidebar displays a view that can show the text file’s outline, index cards, and comments.
You can also use the navigation sidebar to add, rename, and delete text file items. These functions are available when you tap the Edit button.
Note: As with the Project view, you can press and hold an item in the navigation sidebar to rename it. If you’re viewing index cards, the card editor will appear. This provides a quick way to modify a card while you are writing.
Entering and selecting text is easy.
You can adjust the selection by touching and dragging the blue selection handles at either end of the selection.
On iPad, the extended keyboard includes arrow keys for positioning the cursor.
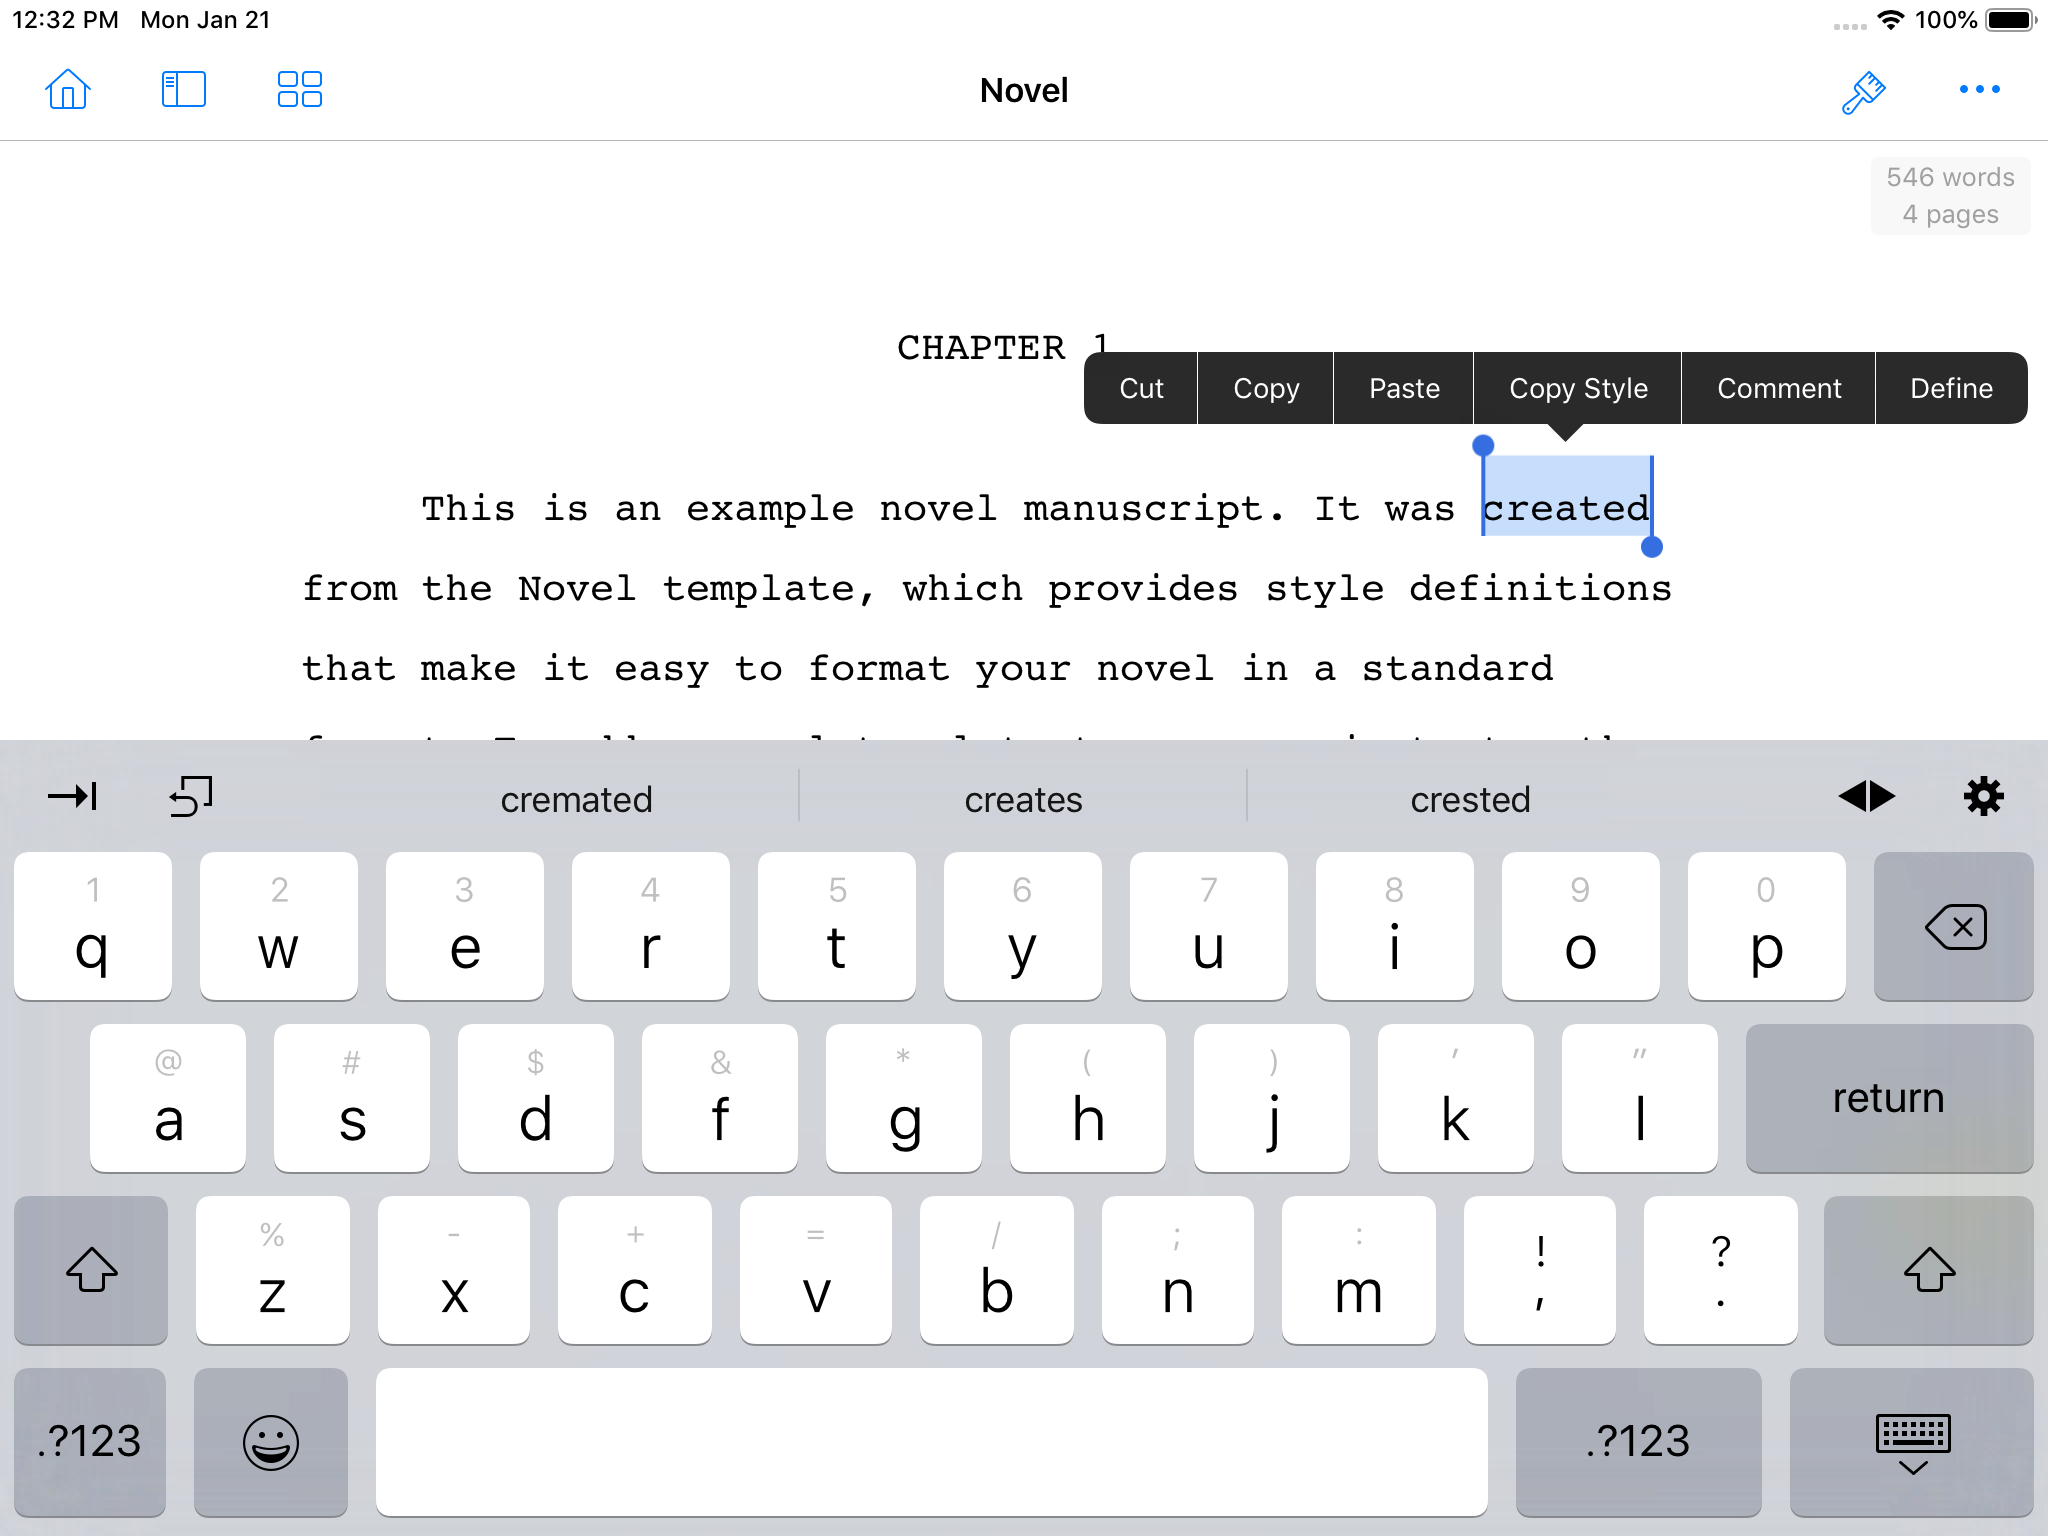
On iPhone and iPod touch, the extended keyboard includes a Selection button that changes the keyboard to display keys to:
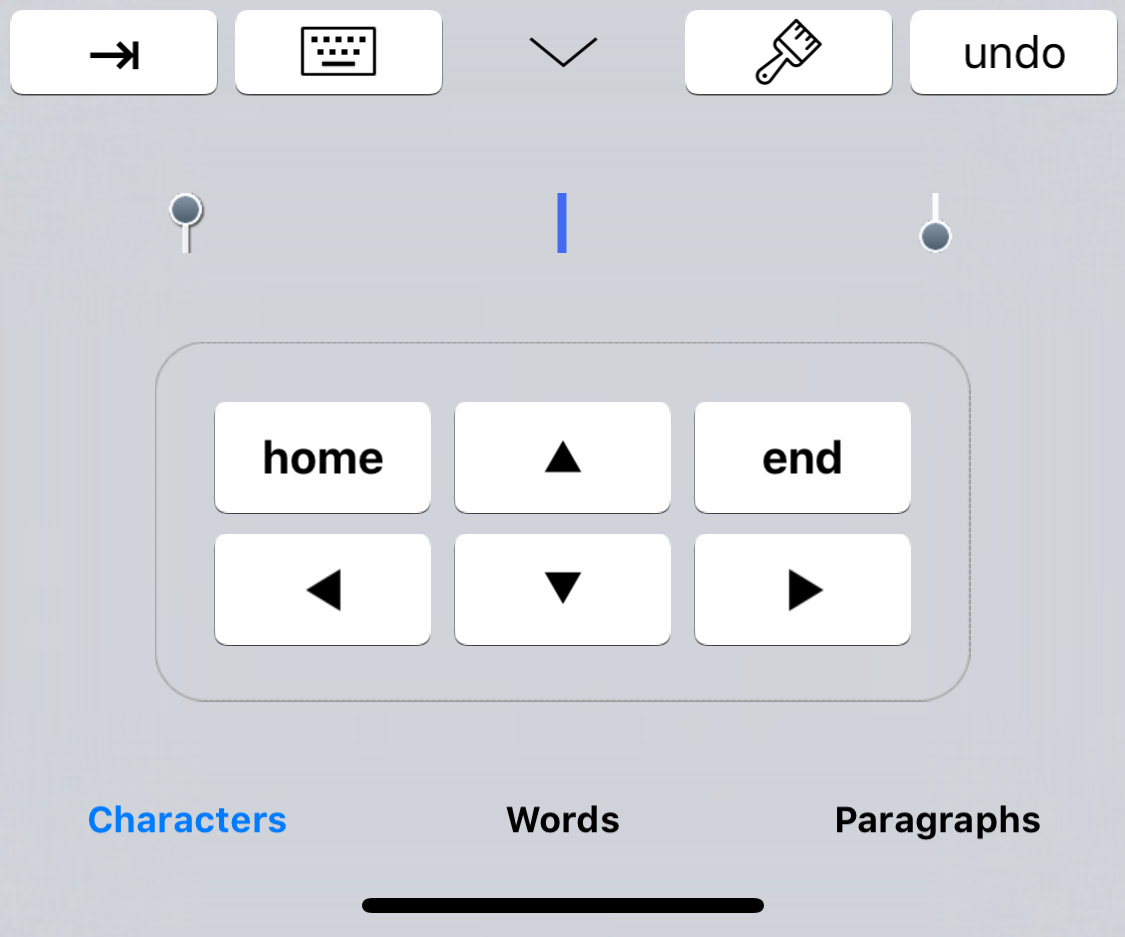
For example, to extend the current selection to the next paragraph boundary:
Undoing and redoing editing operations is also straight-forward.
On iPad:
On iPhone and iPod touch:
Note: Storyist also works great with external keyboards like the Smart Keyboard Folio.
Storyist can check your spelling for you as you type.
To enable spell checking:
When spell-checking is enabled, Storyist flags each misspelled word with a dotted red underline.
To correct a spelling error:
Note: Storyist uses the language setting of the current keyboard to decide which language to use for spell checking. If you have previously added additional languages to your keyboard using the Settings app (General > Keyboard > Keyboards), you can use the world icon that appears near the space bar on the keyboard to switch between these languages.
The Spelling menu also lets you enable or disable auto-capitalization and auto-correction. If you enable auto-capitalization, Storyist will automatically capitalize the first word in a sentence. If you enable auto-correction, Storyist will automatically correct misspelled words if it can determine the correct spelling.
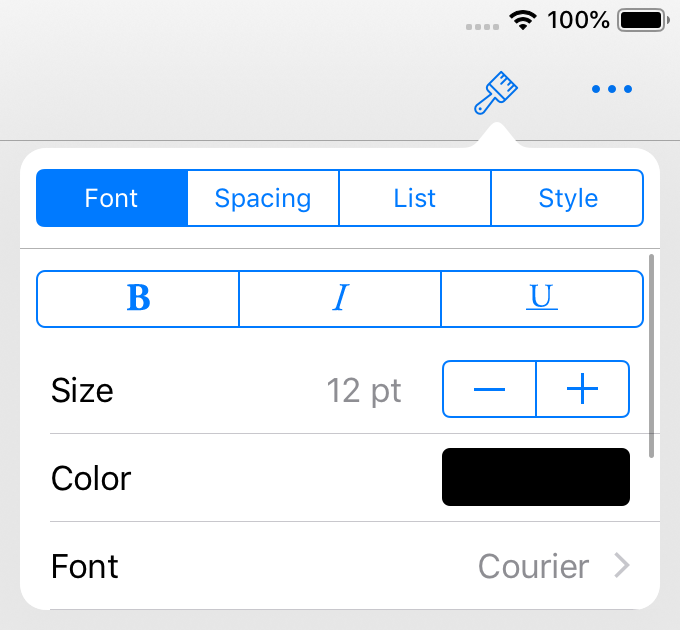
The Font inspector lets you change properties such as font name, point size, and color. To bring up the Font inspector, select some text, tap the Format button, and then tap the Font tab.
Note: On iPad, the Format button appears in the Toolbar. On iPhone and iPod touch, it appears on the extended keyboard.
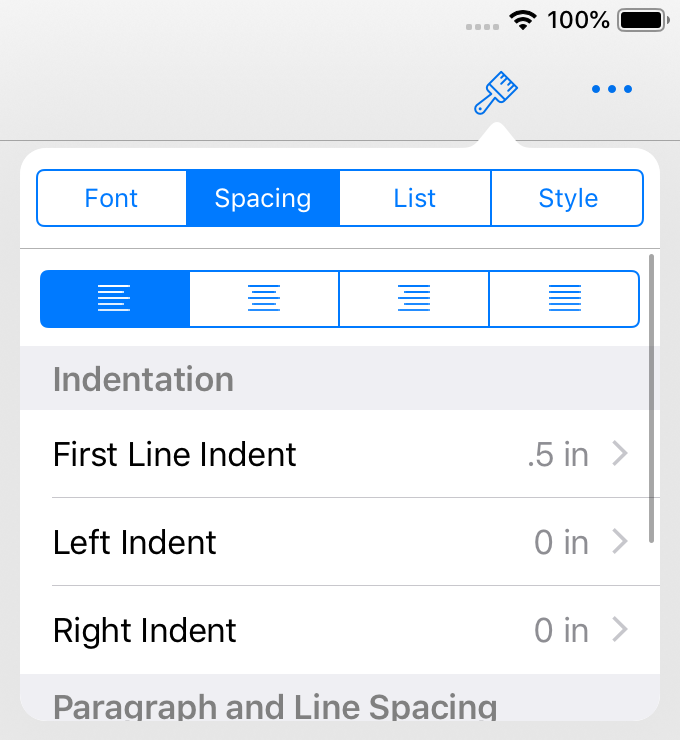
You can change the paragraph alignment and spacing by tapping the Format button and then tapping the Spacing tab.
The Spacing tab lets you set paragraph alignment, indentation, and spacing.
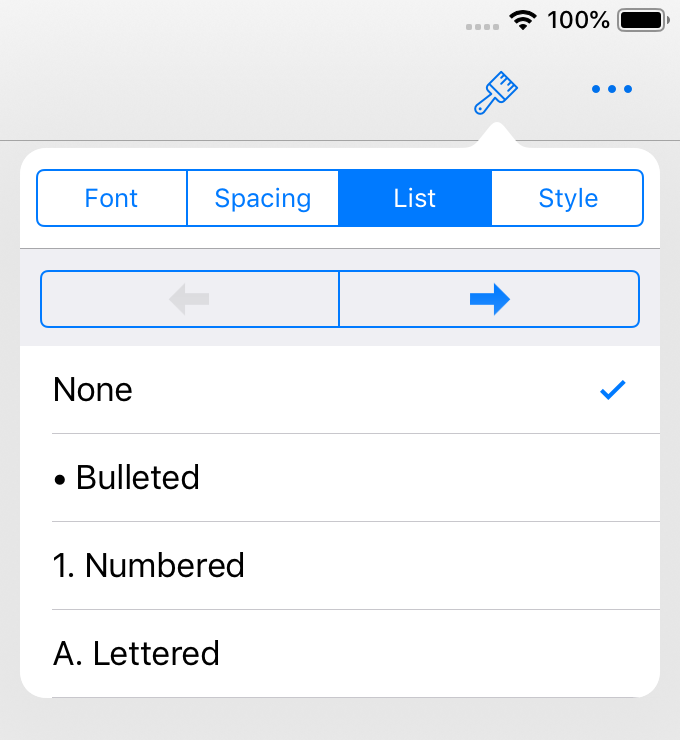
You can use the List inspector to create and modify lists.
A style is a collection of font and paragraph formatting settings. Each Storyist template provides a group of styles, called a style sheet, that can be used to format your document quickly and consistently.
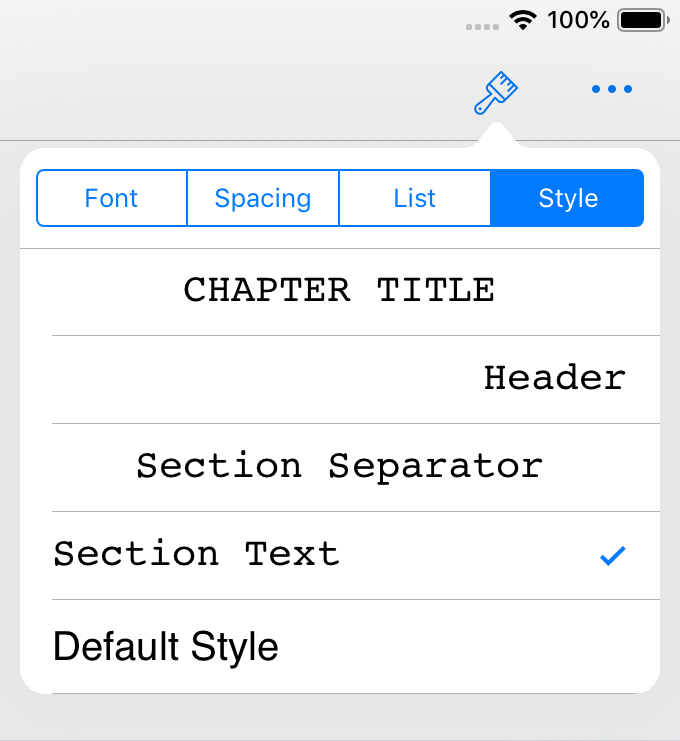
To apply a style to a paragraph:
To apply a style to all paragraphs formatted in a given style:
All text having the original style is reformatted with the replacement style.
Note: When applying the replacement style, the Replace Styles command preserves any formatting that has changed from the original style (that is, the style overrides). For example, if a paragraph contains bolded, italicized, or underlined words, and the original style does not specify bold, italics, or underlining, these formatting features are preserved after the replacement style has been applied.
To edit a style:
On iPad, you can also edit a style by changing a paragraph’s font and paragraph properties to the desired values and then choosing Edit > Style > Redefine Style from Selection. The style definition and all paragraphs having the selected style will be updated.
To delete a style from the style sheet:
Note: Styles that are in use in the document are indicated by the “(in use)” label and can’t be deleted. You can use the Replace Styles command to apply a different style to the text so that the style you want to delete is no longer in use.
On iPad, you can also create new styles to use in your document. To create a new style:
You can add an image to a text file by copying the image from a webpage or from the Photos app and pasting it into your text. When you do so, Storyist inserts the image into the text and also places it in the Images folder so that you can reuse it.
Another way to insert an image to a text file is to tap the location in the text where you want to insert the image, and then do one of the following:
To resize an image:
Note: Storyist allows you to insert images only in text files associated with a project. RTF, Fountain, and Final Draft files do not support images.
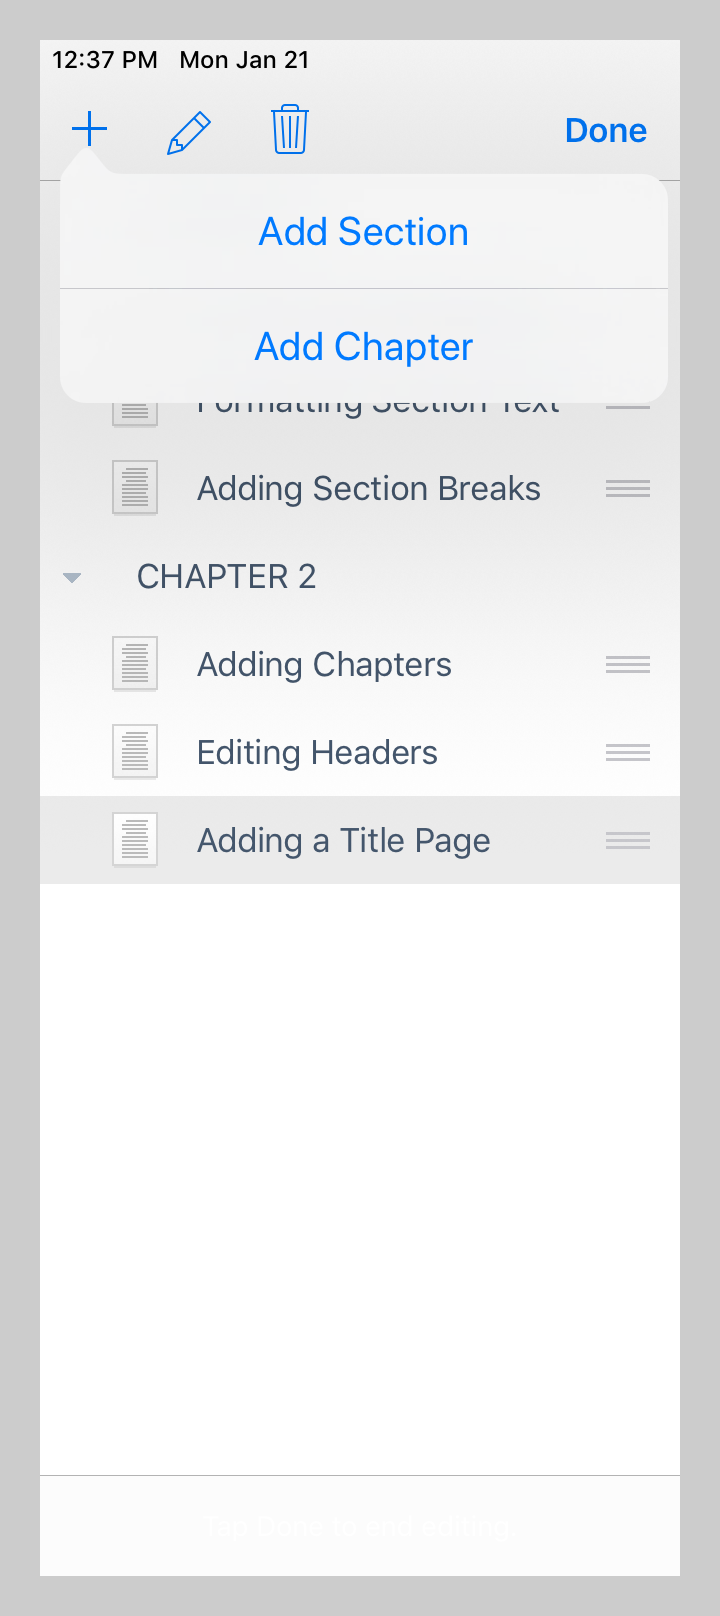
You can add new chapters, sections, or scenes (or more generally, outline elements) to your text at any time.
One way to do this is to simply type them in your manuscript and apply a style from the style sheet. To use this method:
You can also add outline elements using the navigation sidebar.
To use this method:
Note: Adding index cards to the index card view also adds the corresponding outline element to the text. For more information on index card support in Storyist, please see the “Working with Index Cards” section below.
As you are writing, you might want to add comments (annotations) on specific paragraphs or sentences for later revision.
To add a comment to a text location:
To close the comment editor, tap in an area outside the editor. The comment will shrink and move to a point in the margins of the text. To edit the comment again, tap the comment icon in the margin.
To delete a comment, you can either delete the text containing the comment, or do the following:
Note: You can control whether comments are displayed in the text view using the Comments switch in the Editor Preferences window (More > Editor Preferences).
In Page mode (that is, when Draft mode is set to OFF), headers and footers are displayed at the top and bottom of each page. Editing them is as simple as tapping in the header or footer area and typing your text.
All standard formatting features—including styles—are available in headers and footers.
To insert page numbers:
You can change the placement of the headers and footers using the Page Setup view. To see the Page Setup view, tap the More icon in the toolbar and choose Page Setup.
Note: If your document does not yet have headers and footers and you’re having trouble locating the header or footer area, you can use the Show Page Guides switch in the Editor Preferences window (More > Editor Preferences) to make them visible.
The Page Setup view allows you to set page margins. To do so:
Note: You can enter margin values in inches, centimeters, points, or picas, using the abbreviations “in,” “cm,” “pt,” or “pc.”
The Page Setup view also lets you set the header and footer spacing and specify that the headers or footers on the first page are different from those on the following pages.
If you want to omit the header and/or footer from the first page:
You can also use the Page Setup view to set the page size to either US Letter or A4.
Note: If the Draft Mode switch is on in the Editor Preferences window (More > Editor Preferences), you can change the margin and header and footer settings, but the changes will not be visible on screen until you turn Draft mode off.
When you edit a screenplay (either one created from the built-in Screenplay template or an imported Final Draft or Fountain file), Storyist puts some additional screenplay-specific tools at your disposal.
These are:
On iPads, the extended keyboard also includes keys for quick access to screenplay elements. These keys correspond to the Scene Heading, Action, Character, Parenthetical, Dialog, Shot, and Transition styles.

Storyist for iOS provides keyboard shortcuts for common actions. To see them, connect a physical keyboard to your iPad and press the Command key. The shortcuts available in the current editor appear in an overlay. The comprehensive list of shortcuts is available here.
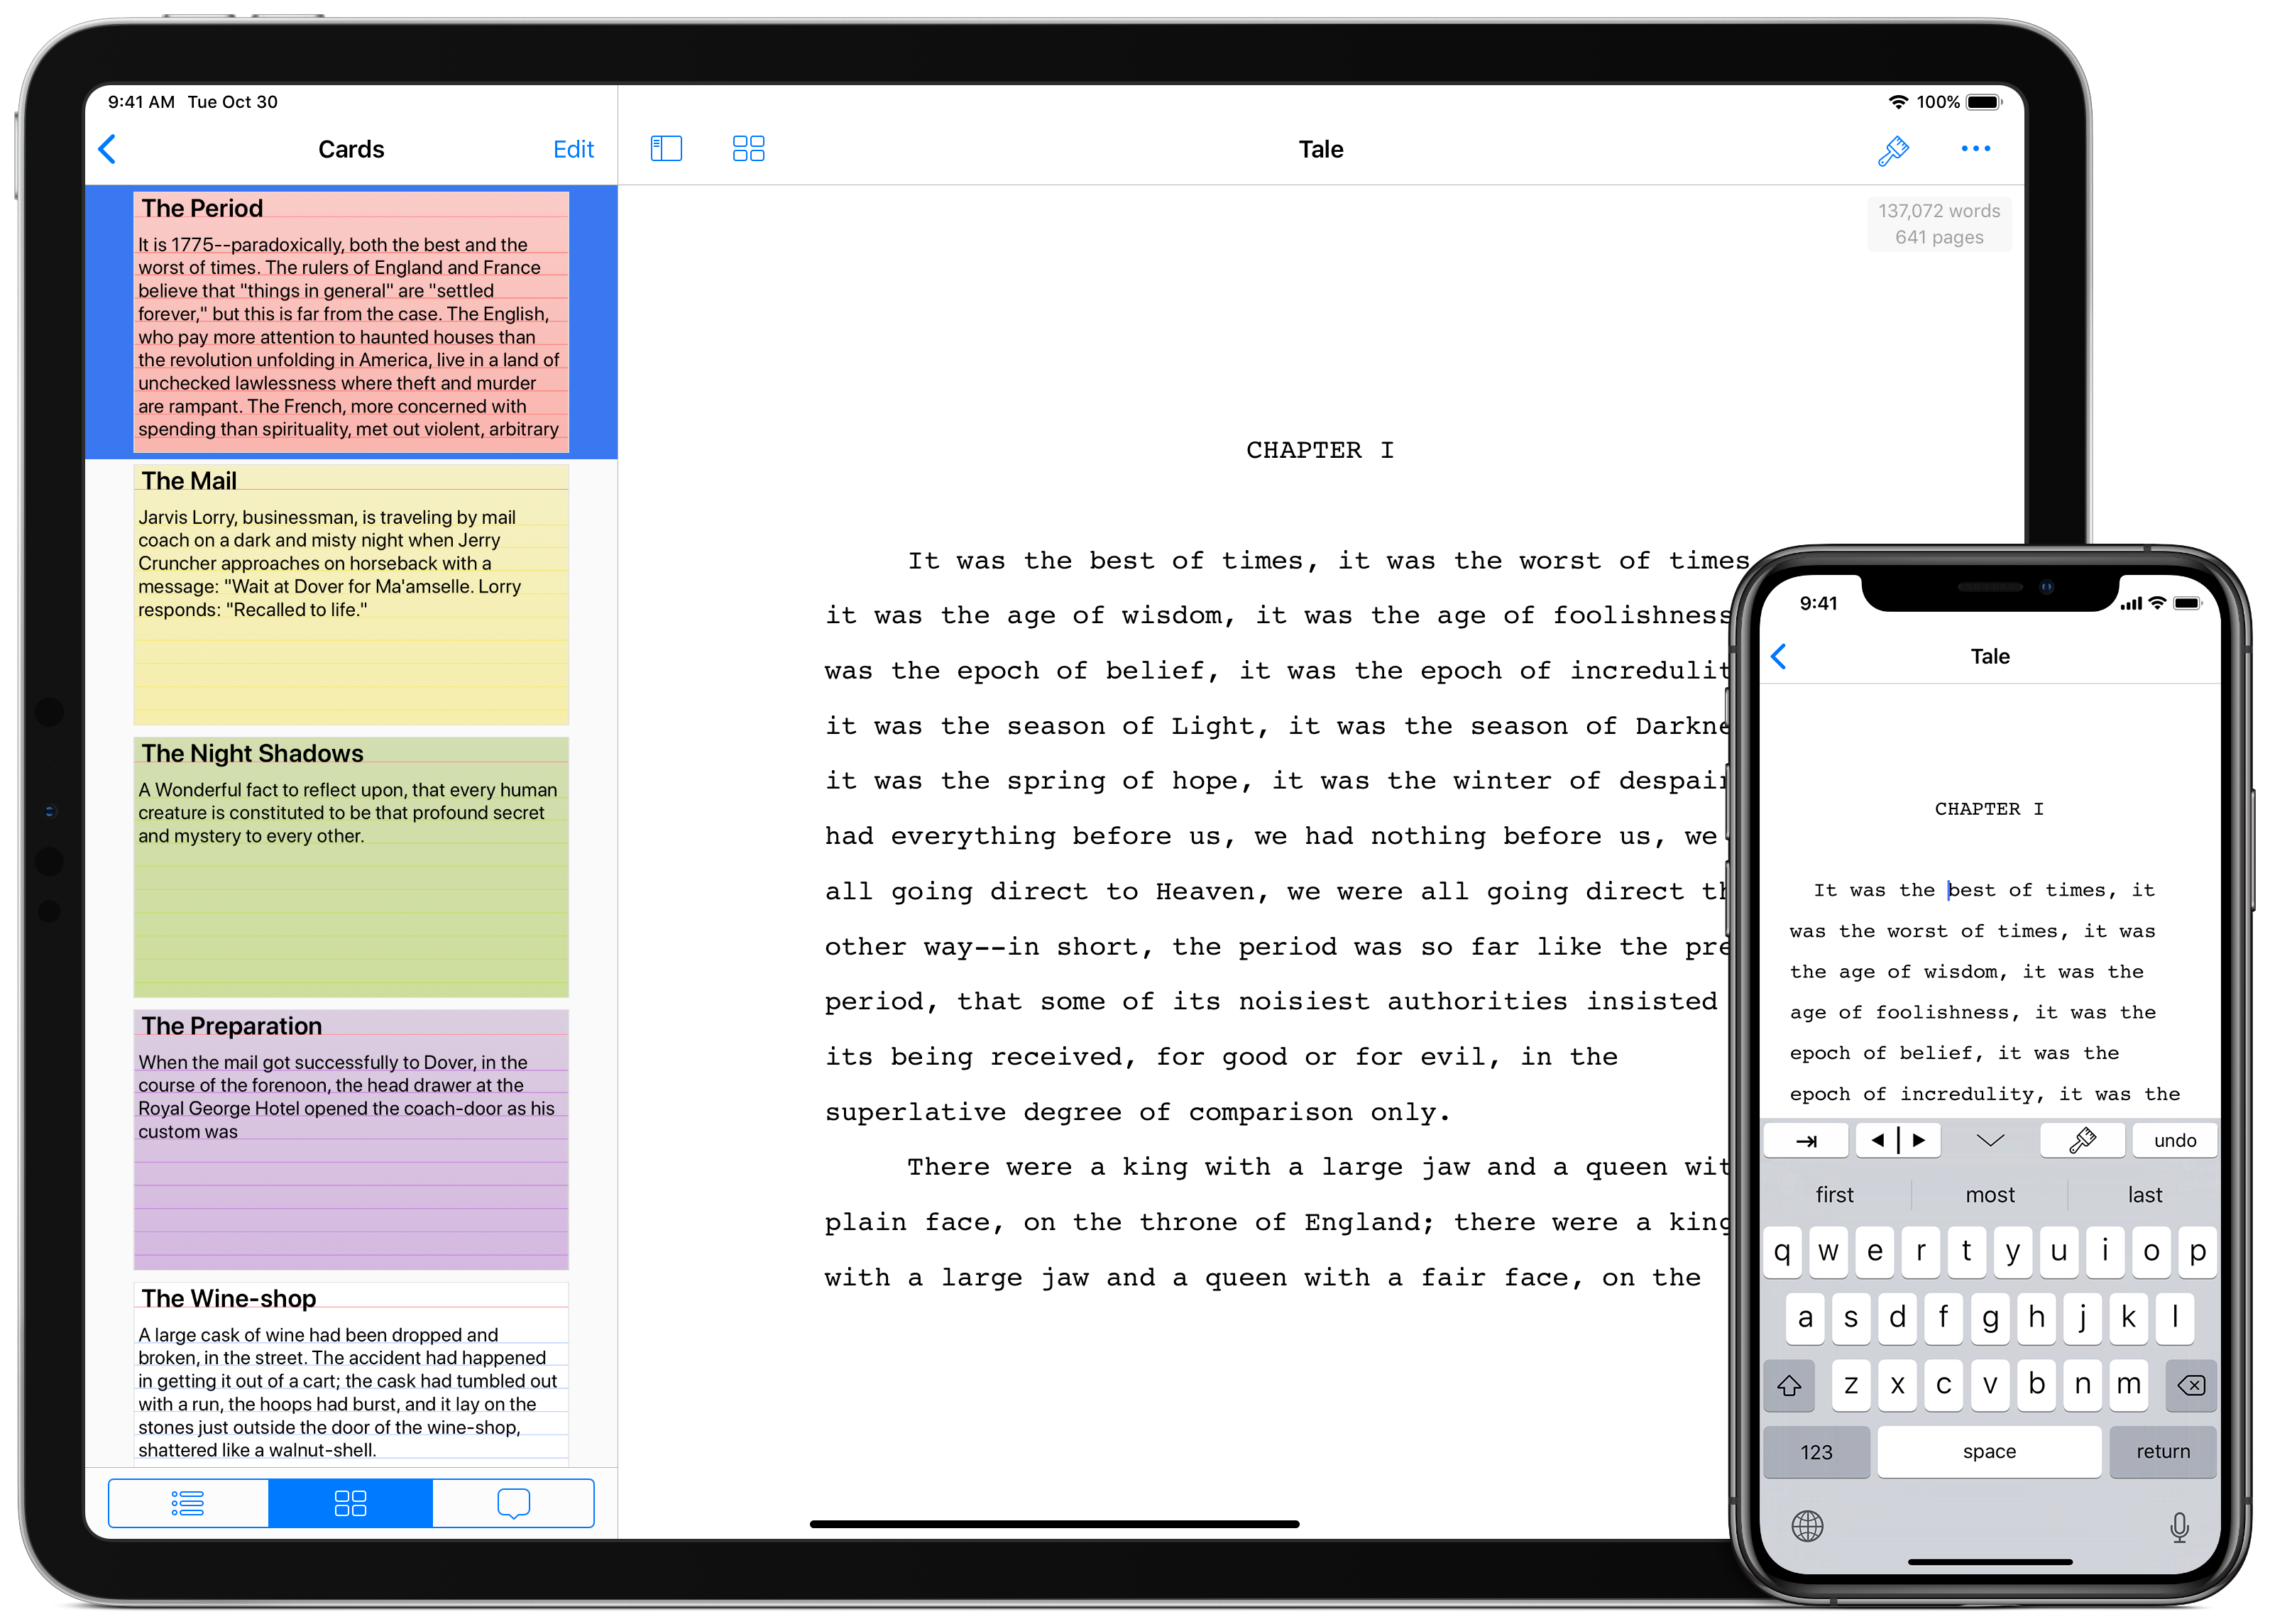
Many writers like to use index cards to get a high-level overview of their writing and to work on the structure of their documents. Storyist provides an index card view with virtual index cards for each chapter and section of your novel, or each scene of your screenplay.
To see the index card view:
You can use the index card view to outline, organize, and structure your work.
To edit a card, simply tap it. The index card zooms to full size and the keyboard appears.
Storyist provides an extended keyboard with keys for moving to the previous or next card and for changing the card color.
There are several ways to add cards to the index card view.
One way is to add them with the index card editor. This is especially useful if you have a bunch of ideas that you want to get down quickly.
A new card is created after the current card and selected for editing.
You can also add cards and labels using the navigation sidebar:
You can arrange the cards by pressing and holding a card and then dragging it to a new position in the index card view.
Note: The text view and the index card view are linked. When you add cards to the index card view, Storyist adds the corresponding elements in the text view. When you rearrange index cards in the index card view, Storyist moves the corresponding text in the text view.
Story sheets are customizable forms tailored for novel writing and screenwriting. They help you keep relevant information about story elements (such as plot, character, and setting) readily accessible while you are writing.
You can use the story sheets to record information such as a character’s physical description, details about a setting, or notes about what happens in a particular section of your story.
To add a story sheet to your project:
Story sheets contain sections for a title (or name), an image, a summary, and for detailed notes.
On iPad, story sheet also provide a set of fields you can use to record information about story elements. In a character story sheet, for example, the available fields are Age, Gender, Eye Color, Hair Color, and Build.
To add a field to a story sheet:
To remove a field from a story sheet:
A picture, as they say, is worth a thousand words. You might imagine a particular actor playing your protagonist or a specific building as a setting for a scene. To help you keep a visual representation of your various story elements in your mind’s eye, Storyist lets you to import images into story sheets.
To add an image to a story sheet:
Alternately, you can copy an image (from a webpage, for example), tap the sheet icon, and tap Paste.
Storyist supports AirPrint, so printing a text file is as simple as opening the file, tapping More > Print, and using the familiar AirPrint dialog to send the file to a printer.
If you prefer to share a digital copy of your work, you can export text files and projects to another apps, to a cloud folder, or to the iTunes application on your computer. You can also share your work via email.
To export a document:
A version is a snapshot of a file’s contents at a specific point in time. To view the list of versions on your device:
To restore a previous version to your Storyist home screen, view the list of previous versions as described above, and then:
When you delete a file from the Storyist home screen, Storyist saves a version of the project in the Recently Deleted folder.
To recover a previously deleted file:
The file is added to the Storyist home screen and its previous versions are made available in the Previous Versions list.
Note: Storyist can only recover items deleted from the Storyist home screen. If you delete a file from a Storyist project and later decide you want to restore it, you’ll need to restore a version of the project containing the file and copy the file to your current project.
To learn more about Storyist, please visit http://storyist.com. There you’ll find additional information on working with Storyist for iOS and Storyist for Mac, including screencasts and an ePub version of this guide for reading in iBooks.
If you have specific questions or would like to suggest a feature, please send mail to support@storyist.com.
To learn more about Storyist, share tips and tricks with other writers, or discuss writing-related topics, please visit the Storyist Forums at http://forums.storyist.com or check out our Facebook page at https://www.facebook.com/storyist.
To receive notification of new releases, quick tips for using Storyist, and links to writing-related topics, follow us on Twitter at @storyist.
And if you like Storyist and want to help get the word out, please consider leaving a review in the App Store.
Thanks for reading, and good luck with your projects!